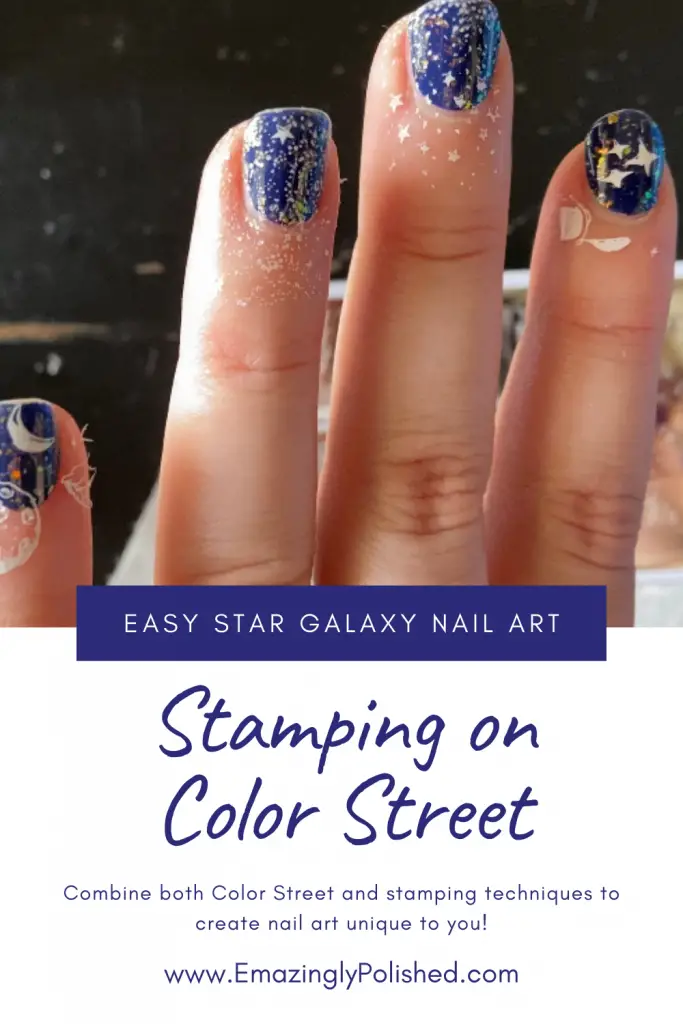
I’m not sure if easy star galaxy nail art will ever go out of style. There’s something beautiful and fun about stars and the multi colors of deep space. This tutorial will show you how to achieve this look and where to buy the supplies I used. Also, be gentle in your critique of this design – it may or may not have been my very first attempt at stamping!
The best thing about stamping with Color Street nail polish strips is that you can get straight to the stamping without having to wait for your base layer(s) to dry. While you still have to wait for the stamping polish(s) to dry, those layers are very thing and don’t take much time at all! I really enjoyed how these turned out and I hope to get more involved with stamping in the future.
Don’t like to support MLM companies? These techniques will work great with any nail wrap you choose! Here are some great alternatives.
This post contains affiliate links for products that I personally use or believe you will love based on quality. If you click on a link and make a purchase I may receive a small commission (at no additional cost to you). This helps support and enable me to continue to make emazing content for you!
Supplies
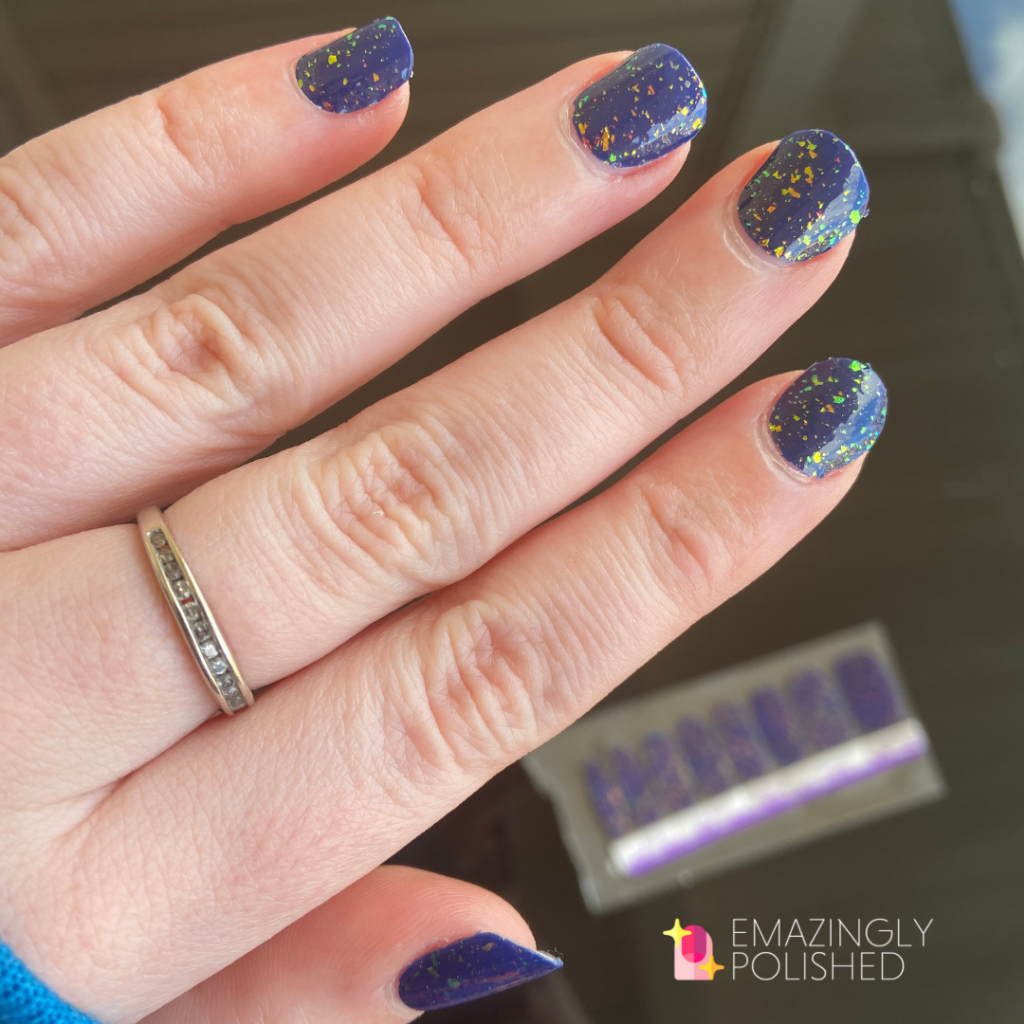
“Deepwater Opal” Color Street nail polish strips
“Marble Galaxy Star Universe” BeautyBigBang stamping plate
“Bam! White” Maniology stamping polish (Use Code THR10 for 10% off)
Clear Maniology stamper (Use code THR10 for 10% off)
Tutorial
For this easy star galaxy nail art tutorial, I already had applied my Color Street nail polish strips for the base of this design. They are quick and with no dry time you can move right into your stamping without the wait. You can learn more about them here. Using dry nail wraps/strips as a base coat is really the best way to start.
I thought the holographic flakes in this particular strip where a perfect place to start for a easy star galaxy nail art.
As you can see I don’t go into the details about how stamping works and how to actually do it on your nails in this tutorial. More to come on that later, but this is ideally for those who are already familiar with stamping. However, if you’re new like I was you can read some beginner information here to get you started.
For this design, I chose to use parts of the stamping plate that weren’t excessive. I wanted to make sure to see as much of the glitter shine through as possible. I have fairly short nails which also limits the amount of each design I can physically have on each nail which is unfortunate. However, there are so many benefits to having short nails in addition to it being a requirement for my day job that the benefits outweigh the disadvantages.
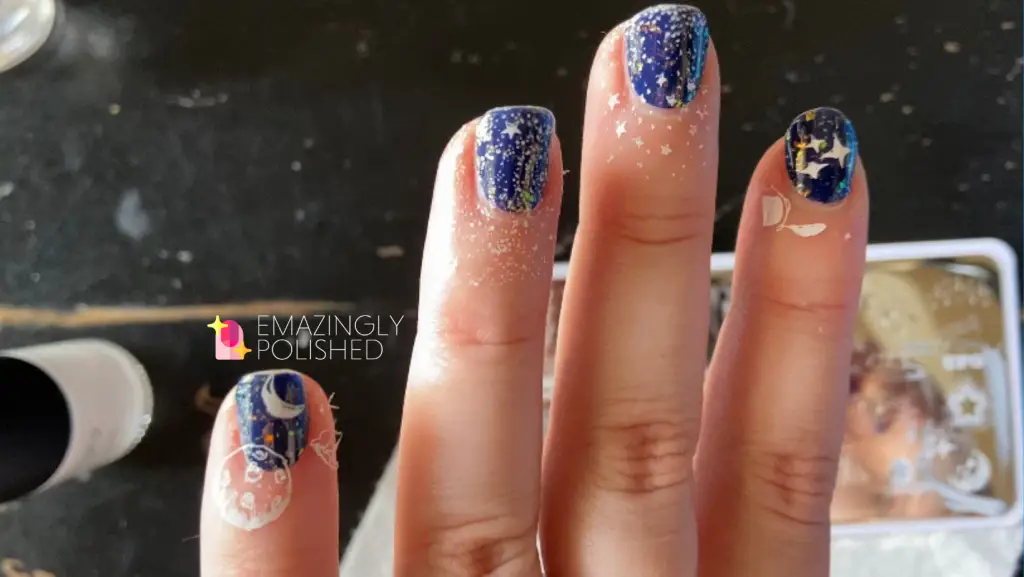
Don’t be afraid to add gems to your easy star galaxy nail art like these rhinestone crescent moons! You can really make it your own by adding your own special touches.
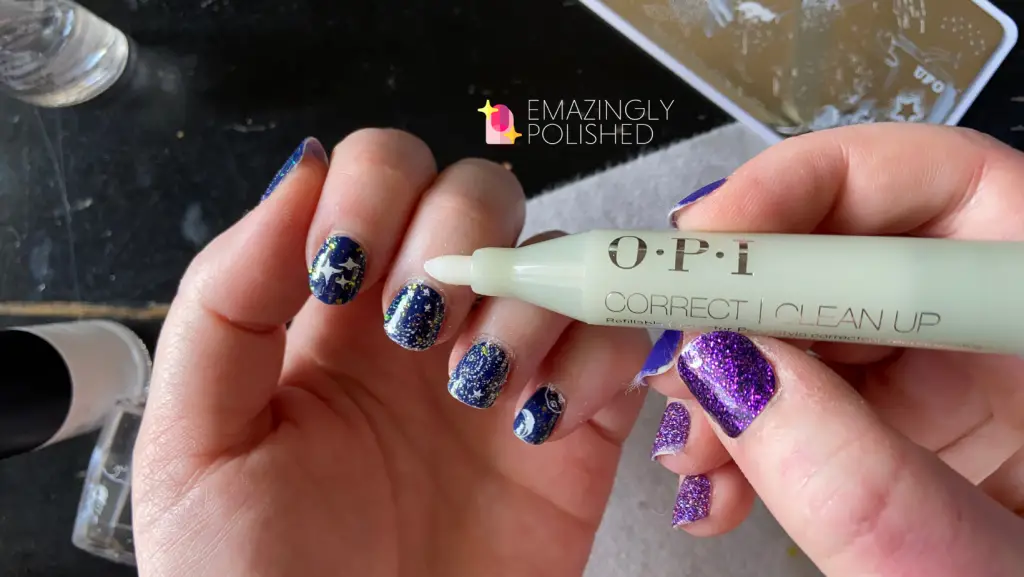
One thing about stamping is that most people end up with excess all over their fingers. You can either use a liquid latex to put around the nails before stamping otherwise use this OPI remover pen to easily go around the edges of the nails. You could also use a Q-tip dipped in nail polish remover as an alternative.
Watch the Video
You can watch this video below for a visual on how I created this easy star galaxy nail art with Color Street and stamping.
I always like to finish off my look with a clear top coat to keep the design safe and long lasting. However, make sure that your nails are COMPLETELY dry before applying it or use Color Street’s Clear As Day nail strip to keep smearing to a minimum. Maniology makes a great “no smudge” top coat which works great for stamping too.
Have you incorporated nail art stamping with Color Street before? Share any tips you have for others below!
Happy Stamping!
Emily